Step-by-Step Guide to Nurturing Your Cut Flowers
Posted on 18/06/2025
Step-by-Step Guide to Nurturing Your Cut Flowers
Bringing fresh cut flowers into your home is a delightful way to brighten up any space, create a serene environment, and add a touch of natural beauty to your daily life. However, keeping your blooms radiant, fragrant, and long-lasting requires more effort than simply placing them in a vase. This comprehensive Step-by-Step Guide to Nurturing Your Cut Flowers will take you through proven practices, professional tips, and the essential techniques that maximize the beauty and longevity of your floral arrangements.
Why Properly Caring for Cut Flowers Matters
Whether they're a thoughtful gift or a treat for yourself, cut flowers are an investment in happiness and aesthetics. Proper flower care maximizes vase life, preserves vibrant color, and keeps petals perky for as long as possible. Neglecting cut flower maintenance can lead to premature wilting, unpleasant odors, and wasted money. Let's explore how to keep your cut flowers fresh, fragrant, and eye-catching with an easy-to-follow step-by-step process.

Essential Supplies for Nurturing Fresh Cut Flowers
- Sharp, clean pruning shears or floral scissors
- Cleansed and sanitized vases
- Room-temperature, filtered water
- Flower food packets or homemade solutions
- Chlorine bleach (for optional disinfection)
- Clean work surface
Step 1: Selecting Healthy Flowers
How to Choose the Freshest Blooms
Picking the best flowers is the first step to extending vase life. Whether at the market or cutting from your own garden, always look for:
- Buds just starting to open – fully-open florals may wilt sooner.
- Upright stems and perky petals – avoid drooping or soft textures.
- No yellowing, browning, or black spots on petals or leaves.
- No droopy, slimy, or crushed-looking stems.
Tip: Choosing seasonal blooms can also make a big difference in longevity and fragrance.
Step 2: Preparing & Cleaning the Vase
Why Vase Hygiene Is Crucial
A clean vase prevents bacterial growth, which is the number one culprit of early flower death. Follow these steps:
- Wash your vase with hot water and a mild, fragrance-free detergent.
- For extra cleanliness, rinse with a solution of 1 part bleach to 10 parts water. Rinse thoroughly with fresh water.
- Dry with a clean, lint-free towel.
Step 3: Trimming & Preparing the Stems
Proper Cutting Techniques for Maximum Absorption
Once your flowers are ready, it's vital to cut the stems the right way to encourage maximum water uptake:
- Use sharp, clean scissors or a floral knife to make a fresh cut.
- Cut stems at a 45-degree angle to increase surface area for water absorption.
- Always cut under running water or submerged in water to prevent air bubbles, which can block water flow.
- For woody stems (like roses, lilacs), gently split the bottom inch of the stem to enhance water absorption.
Pro tip: Remove any leaves that will be below the water level, as they will quickly rot and encourage bacteria.
Step 4: Preparing the Water
Water Quality: The Key to Long-Lasting Bouquets
What's the best water for cut flowers? Room-temperature, clean, and filtered water is ideal. Avoid using softened water, which may contain salts, or very cold/hot water.
- Fill your vase with enough water to cover at least two-thirds of the stem length.
- Add flower food (if provided), following the label instructions exactly. This mixture usually includes sugar (plant food), an acidifier, and a biocide to inhibit bacteria.
- No flower food? Mix 1 tablespoon sugar, 2 teaspoons lemon juice, and a few drops of bleach per quart of water as a homemade solution.
Note: Some flowers, like tulips, prefer less water. Research your particular flowers' needs for the best results.
Step 5: Arranging the Flowers
How to Style Your Cut Flowers Like a Pro
Arranging your blooms properly does more than look pretty – it ensures even hydration and airflow.
- Start with greenery or fuller flowers to form the arrangement's base.
- Add focal flowers (like roses, lilies, sunflowers) using odd numbers for a natural look.
- Fill gaps with accent flowers or delicate stems for detail and texture.
- Give each stem enough room for air to circulate.
- Rotate your arrangement occasionally for even exposure to light.
Step 6: Where & How to Display
Choosing the Perfect Spot for Your Cut Flowers
Placement impacts flower life tremendously:
- Keep arrangements out of direct sunlight, which can dry petals and overheat stems.
- Avoid placing near fruit bowls – ripening fruit releases ethylene gas that can hasten petal drop.
- Drafty windows, air vents, and heat sources will accelerate wilting, so find a cool, stable location.
- Display in rooms with moderate humidity and indirect light for optimal freshness.
Step 7: Maintaining & Reviving Your Cut Flowers
Daily Care Tasks for Prolonging Vase Life
Flower care doesn't stop after arranging:
- Change the water every 2 days. Thoroughly rinse the vase and refill with fresh, flower food-infused water.
- Re-trim stem ends every 2-3 days, removing about 1/2 inch for renewed water uptake.
- Remove wilted blossoms and leaves promptly to prevent decay and fungal issues.
- Spritzing delicate flowers occasionally with lukewarm water can enhance freshness.
How to Revive Wilting Stems and Drooping Flowers
If your cut flowers begin to wilt, don't give up! Try these revival tips:
- Give stems a fresh angled cut and submerge in warm water for 30-60 minutes before returning to the vase.
- Try the boiling water method for woody stems: dip the ends in boiling water for 20 seconds to help break airlocks.
- Remove fading flowers to allow more resources for the remaining blooms.
Specific Care for Popular Cut Flower Varieties
Roses
- Remove any thorns or lower leaves to prevent bacteria.
- Use lukewarm water for initial hydration.
- Recut stems daily for extended vase life.
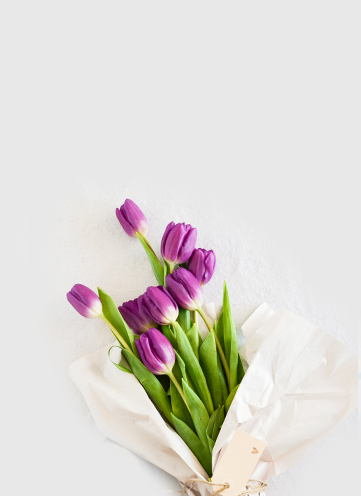
Tulips
- Keep in shallow water to prevent stem bending.
- Display in cool rooms and away from direct sunlight.
- Tulips continue to grow in the vase; trim as needed.
Lilies
- Remove pollen to prevent staining.
- Cut at a sharp angle for best water uptake.
- Support heavy blooms with tall vases.
Wildflowers & Field Blooms
- Trim all stems and remove lower leaves.
- Change water frequently – these flowers decay fastest.
Natural Tips & Tricks for Longer Lasting Cut Flowers
- Use a clear vase for easier water-level checks and to spot murkiness quickly.
- Add crushed aspirin or clear soda to the water to nourish blossoms (experiment for results).
- Keep flowers cool overnight - some florists suggest refrigerating arrangements for special events.
- Always remove dying or faded flowers immediately.
Common Mistakes to Avoid in Cut Flower Care
- Using dull, crushing scissors or dirty tools
- Leaving leaves below the waterline
- Forgetting to change water regularly
- Not re-trimming stems after a few days
- Placing arrangements near heat/electronics/fruits

Frequently Asked Questions (FAQs) About Cut Flower Maintenance
- How often should I change the water in my vase?
Change every 1-2 days, washing the vase and adding fresh flower food or solution. - What is the best water temperature for cut flowers?
Lukewarm to room temperature is ideal for most varieties. - How can I stop my vase water from smelling?
Keep stems trimmed, remove all debris below the waterline, and add a drop of bleach as a biocide. - Is sugar water good for all flowers?
Most common flowers benefit, but do your research as some (e.g., some wildflowers) thrive best in plain water. - How do I stop my flowers from drooping?
Cut stems at an angle, recut as needed, change water regularly, and remove any decaying plant parts.
Conclusion: Celebrate the Beauty of Your Blossoms
With a little attention and some easy, consistent nurturing, your cut flowers will remain a source of joy and elegance for much longer. By following this step-by-step guide to nurturing cut flowers, you'll impress your guests and enjoy spectacular color, fragrance, and vitality every time you bring a bouquet home. Remember, proper preparation, regular care, and a few floral know-how tricks are all it takes to get the most from your bouquets, arrangements, and homegrown stems!
Now you're ready to take your fresh flower enjoyment to a new level. Happy arranging!
Latest Posts
Find peace in your workspace with these hardy plants
Peonies and Their Colors: A Symbolic Exploration
Dive Into the World of Sunflowers: 8 Facts


